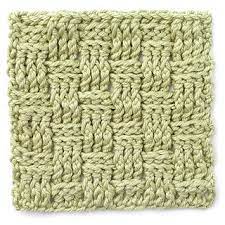
Stitch of the Month...Basketweave Stitch
- Rebekah Bowen
- Nov 20, 2023
- 3 min read
Ever wonder why certain crochet stitches are better for some patterns and not others? Does using a particular stitch really make a difference in the finished product? Even if you are not a crocheter, having a little bit of stitch knowledge can help you pick the best quality product.
This year I want to find new stitches I haven't used yet. Come along with me as I explore new and fancy stitches and what projects they are best used for.

Weaving in the Fun!
When I think of outstanding cozy patterns for fall, the Basketweave is the first to come to mind.
It is a classic and timeless style that will keep you in fashion year after year.
Crocheting the Basketweave stitch is not hard, but it does require knowledge on the anatomy of the Double Crochet stitch. The Double Crochet is a tall stitch that looks like a vertical fence post, and in fact that is what the middle of the stitch is called "a post". You do not go into the top of the stitch when you make a basketweave; you either insert your hook from the back of the post to the front, or from the front to the back. When you make a basketweave, you don't go into the top of the stitch; instead, you insert your hook from the back to the front or from the front to the back. The stitch will be wrapped around the post which makes the Double Crochet look like it is either in front of or behind, like an actual woven basket. You will work the pattern in rows.
And once again thank you Daisy Farm Crafts for the easy to follow instructions and video!

Written Instructions:
Make a chain in multiples of 8 then add 4.
In the 4th chain from the hook, (the chain 3 counts as first DC) DC into each stitch across. Ch 3 and turn. FP DC (front post double crochet) around the next 4 DC‘s. Then, BPDC (back post double crochet) around the next four. Alternate to the end. You should have one DC left (the turning chain) and in that one, do a regular DC into the top of the stitch. (Not around the post) chain 3 and turn. FPDC around the post of the next 4 DC, BPDC around the posts of the next 4 and repeat across. The last stitch will be a dc into the top of the turning chain.
Repeat this two more times, or until you feel like a square is made. If you use chunky yarn two rows might be just fine.
To make a new row of blocks that are the opposite, after the chain three and turn, start with a BPDC around the post of the next 4 stitches, then FPDC around the post of the next four stitches. The ends will always finish with one DC into the top of the turning chain.
Mastering this technique gets you one step closer to understanding how cables are made. Try it out! And good luck. Here is a video clip of the basketweave stitch:
Daisy Craft Farms
Limitless Possibilities
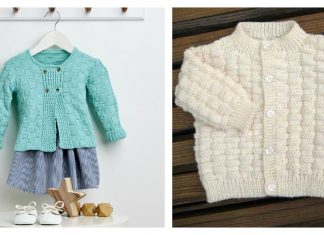
There really is no limit to what you can create with the Basketweave stitch...sweaters, scarves, gigantic blankets, baskets, purses, vests, pillows....so so much more!


Comments